Network Address Translation NAT Configuration on Packet Tracer
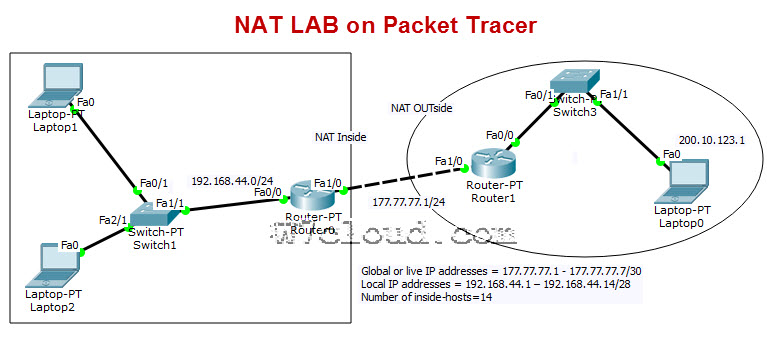
NAT ( Network Address Translation ) is used for security by reusing IP-addresses. The router on which Network Address Translation is configure translates traffic which is accessing internet or coming back to local network. A NAT is the virtualization IP-addresses. This is Simple lab for configuring NAT ( Network Address Translation ) on packet tracer. Our network diagram consist of two parts, one is the LAN which is define as inside network and other is the internet or public network which will be define as outside for network address translation (NAT). For configuring this lab pleas follow these steps:
Task 1: Configure IP addresses and setting a static default route.
Access the CLI and specify the following IP address configuration on both routers
R1 Config:
Router1(config)#int fa1/0
Router1(config-if)#ip address 177.77.77.10 255.255.255.0
Router1(config-if)#no shu
Router1(config)#ip route 192.168.44.0 255.255.255.0 177.77.77.1
R0 config:
Router0(config)#int fa1/0
Router0(config-if)#ip address 177.77.77.1 255.255.255.0
Router0(config-if)#no shut
Router0(config)#int fa0/0
Router0(config-if)#ip address 192.168.44.1 255.255.255.0
Router0(config-if)#no shut
Router0(config)#ip route 200.10.123.0 255.255.255.0 177.77.77.10
Router0(config)#exit
Task 2: Configure NAT on Router0
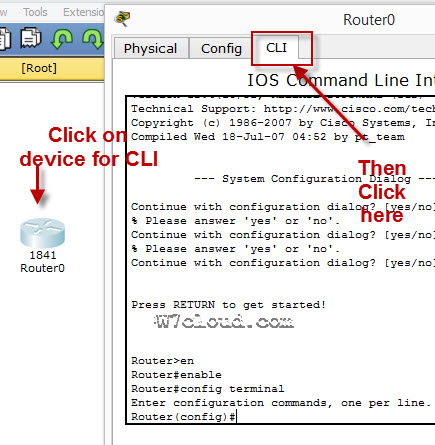
Step 1: Access the CLI on the Router0
Step 2: Configure a standard access list using an access list id of 1 and permit any device on subnet 192.168.44.0 /24
Router0(config)#access-list 1 permit 192.168.44.0 0.0.0.255
Here access list is used to identify which source IPs are going to be translated using NAT, and this example allows any device from the 192.168.44.0 network.
Step 3: Create a dynamic NAT IP-address pool, this will hold a list of inside global addresses.
| Name of Pool: | NAT-POOL |
| Starting IP address | 192.168.44.1 |
| Ending IP address | 192.168.44.14 |
| Network mask | 255.255.255.240 |
Complete this configuration with following commands:
Router0(config)#ip nat pool NAT-POOL 177.77.77.1 177.77.77.7 netmask 255.255.255.240
Router0(config)#ip nat inside source list 1 pool NAT-POOL
For network address translations, we are requires to identify at least two interfaces to be our inside and outside.
Interface fa0/0 will be our inside interface
Interface fa1/0 our outside interface
You can use the following commands for configuring inside and outside interfaces.
R0(config)#int fa0/0
R0(config-if)#ip nat inside
R0(config-if)#int fa1/0
R0(config-if)#ip nat outside
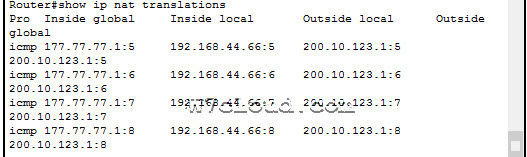
Step6: Testing NAT translation: When we ping from PC1 to PC0 to R1 our original IP address will be translated from a 192.168.44.x to 177.77.77.x.
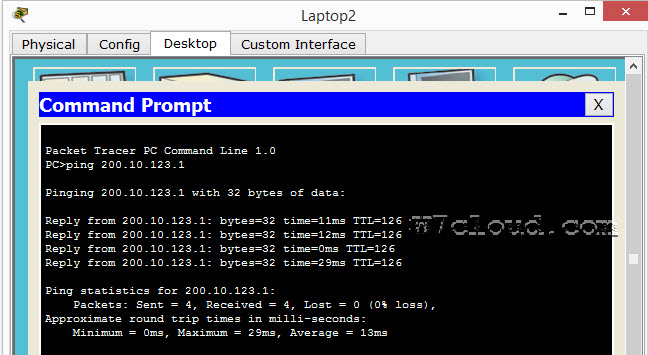
You can verifiy it after the successful ping from PC1 to PC0 and then use the command “show IP nat translation”.