Calibrating your HP printer is fundamental to achieving optimal print quality and color accuracy. Whether you use your printer for professional documents or vibrant photographs, calibration ensures that the colors you see on your screen match the final prints.
How To Calibrate HP Printer
In this guide, we will provide you with step-by-step instructions on how to calibrate your HP printer, allowing you to unlock its full potential and produce exceptional prints with consistent and true-to-life colors. By following these calibration techniques, you can take your printing experience to the next level and ensure that your prints accurately reflect your vision and artistic intent.
You can overcome issues like color variations, improper saturation, and inconsistent print results by calibrating your printer. It allows you to fine-tune the settings and bring out the best performance from your HP printer.
Why printer calibration is important?
Printer calibration is important for several reasons:
Accuracy: Calibration ensures that the colors printed by your printer match the intended colors, resulting in accurate and consistent prints.
Color consistency: By calibrating your printer, you can maintain consistent color reproduction across different print jobs, ensuring that your prints accurately reflect your original design or image.
Professional output: Calibration helps achieve professional-level print quality, which is crucial for businesses, photographers, graphic designers, and anyone who requires high-quality prints.
Eliminating color cast: Calibrating your printer helps eliminate color cast issues, where prints may appear too warm, cool, or have a noticeable tint, ensuring a more natural and balanced color representation.
Fine-tuning settings: Through calibration, you can fine-tune various printer settings, such as color balance, contrast, and saturation, to achieve the desired print output.
Cost savings: By calibrating your printer, you can optimize ink or toner usage, minimizing waste and reducing overall printing costs.
Consistency across devices: Calibration facilitates consistency in color output across multiple devices, allowing you to achieve a cohesive look and feel in your prints, whether viewed on screens or in physical form.
Understanding Printer Calibration
Printer calibration is the process of aligning your printer’s settings and colors to ensure accurate and consistent output. Like a musical instrument that needs tuning, your printer requires calibration to perform at its best.
Calibrating your HP printer offers several benefits. It helps eliminate color cast, where prints appear tinted or skewed.
Furthermore, calibration enhances color accuracy, bridging the gap between what you perceive on your screen and the final representation on paper. It ensures a harmonious alignment between the digital and printed worlds, guaranteeing that the colors you see and select during the design process are faithfully reproduced in your printed output.
You can achieve remarkable results and bring your prints to life by following a few simple steps. Now we will learn how to calibrate your color printer.
How to calibrate hp printer ink from Printer’s Settings
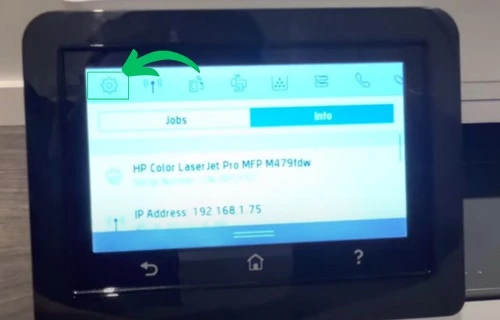
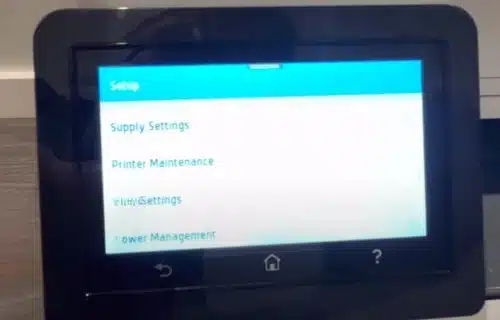
To access the calibration settings on your HP printer, begin by navigating to the printer’s menu or control panel. These settings may vary on different printer models.
Once you find the printer’s menu, go to the “Settings” or “Setup” option.
Same setting on some old HP printer show like this
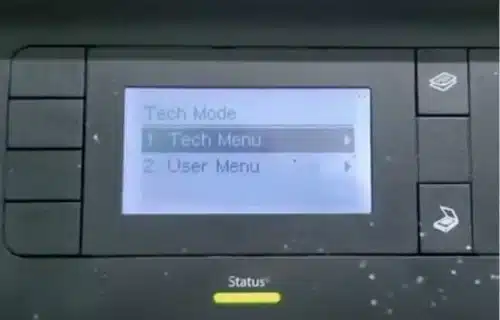
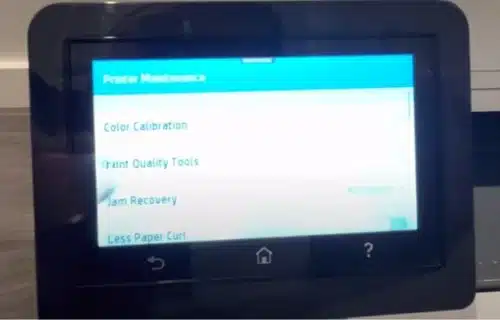
Within this menu, you should find a sub-menu or section dedicated to “Calibration” or “Color Calibration.”
Navigate to the calibration settings and select the appropriate option to begin the calibration process.
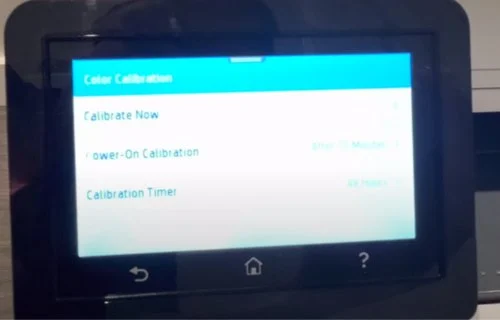
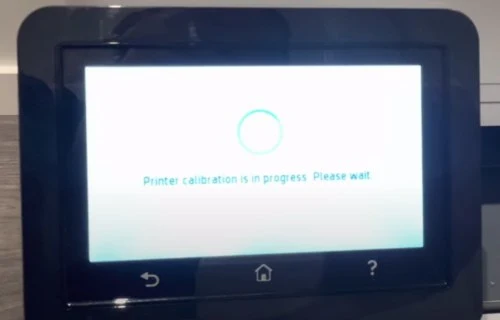
Now your printer starts measuring and printing the calibration page.
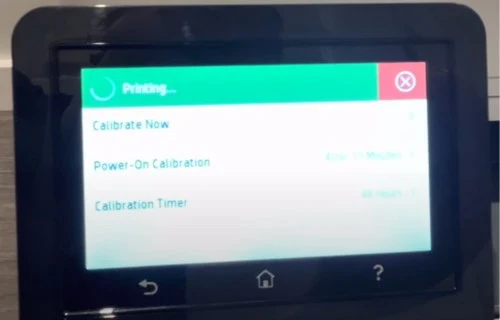
Depending on your printer model, this will vary slightly, but the menu should guide you through the steps.
How to Calibrate the HP Printer Using HP App
You can perform the same using the HP printer app, go to the setting printer app. Find the calibration or alignment setting.

In the alignment setting you will the setting like “align Printhead”, and tab on align to start this process.
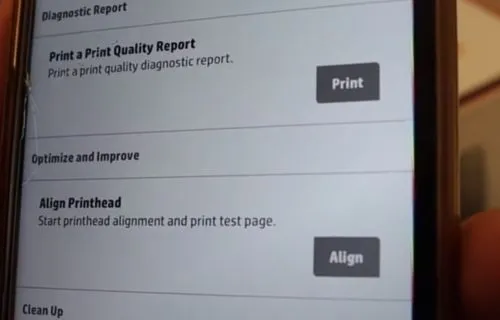
Once the process is completed it will produce a Calibration Page.

Now that you’re in the calibration settings let’s move on to the next step: printing a calibration page.
Printing a Calibration Page
Printing a calibration page is an integral part of the calibration process. This page contains a series of test patterns and color samples that help assess and adjust your printer’s settings.
During the calibration process, an HP printer will automatically initiate the printing of the calibration page. Additionally, the HP printer will print this calibration page whenever a new ink cartridge is inserted into the printer for the first time.
To print a calibration page manually using your HP printer, follow these steps:
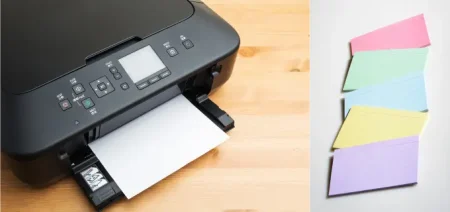
- Ensure that plain white paper is loaded into the printer’s input tray.
- Select the option to print a calibration page from the calibration settings menu.
- Confirm the printing settings, such as paper size and orientation, before initiating the print job.
- Press the “Print” button or equivalent command to start printing the calibration page.
Be patient while the printer works its magic. Once the calibration page is printed, it’s time to move on to the next step: interpreting it and making necessary adjustments.
How to analyze a Calibration Page
The calibration page contains color patches, gradients, and alignment patterns. The color patches represent primary and secondary colors. Ensure that the colors appear vibrant and accurate without any tint or discoloration.
The alignment patterns help ensure proper print head alignment, indicated by straight and parallel lines. Evaluating these elements allows you to assess your printer’s performance and identify areas for adjustment. After interpreting the page, you can proceed to adjust printer settings accordingly.
Adjusting the Printer Settings
After calibrating the printer using the calibration page, adjust the printer settings based on the identified issues. Modify color balance, saturation, or hue settings in the calibration menu for color variations.
Fine-tune settings for contrast and brightness in the image settings or advanced options. Save changes for future print jobs. After adjustments, repeat the calibration process to validate improvements.
Repeating the Calibration Process
Repeating the calibration process is essential to ensure the adjustments effectively address the identified issues. It may require multiple attempts to achieve the desired results. Print another calibration page using the same method and compare it with the previous one to assess improvements.
Your HP printer is now calibrated for high-quality prints, but further adjustments can be made in the printer settings if needed. Calibration is an ongoing process to maintain consistent results, especially as your printer ages or if you change ink or paper types. Next, we’ll address common calibration issues and provide troubleshooting tips.
How to Calibrate Printer Color
To calibrate your printer’s color, follow these steps:
- Open the Start menu and type “color calibration” into the search field.
- Select the matching result to open the color calibration tool.
- In the advanced tab, locate the display calibration section.
- Click the “Calibrate display” button to initiate the calibration process.
Troubleshooting Common Calibration Issues
Even with proper calibration, occasional issues may arise. Here are some common calibration problems and troubleshooting tips to help you resolve them:
Color Cast: Check the color balance settings if your prints have a noticeable color tint. Set each color channel to get a more clear and more accurate result.
Banding or Gradient Issues: Uneven gradients or visible banding can be caused by incorrect print head alignment or clogged nozzles. Run the printer’s cleaning and alignment utilities to address these issues.
Blurriness or Lack of Detail: Check the print quality settings if your prints appear blurry or lack fine details. Select the correct resolution and print mode that aligns with your desired print output.
Inconsistent Colors: If your prints consistently produce different colors than what you see on the screen, calibrate your monitor as well. A mismatched monitor calibration can impact color accuracy.
Paper Jamming: If your printer frequently experiences paper jams during or after calibration, ensure that the paper is properly loaded and there are no obstructions in the paper path. Clear any paper jams and try again.
How can I improve the print quality on my HP printer?
To improve print quality on your HP printer, consider the following tips:
Use high-quality paper: Opt for paper specifically designed for your printer type to ensure optimal results.
Clean the printhead: Regularly clean the printhead to remove any ink buildup or clogs that may affect print quality.
Adjust print settings: Experiment with different print settings, such as resolution and print mode, to find the optimal balance between speed and quality.
Update printer drivers: Keep your printer drivers updated to ensure compatibility and access to the latest performance enhancements.
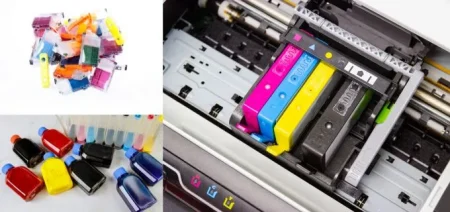
Check ink or toner levels: If Ink or toner level is low, you need to Replace or refill ink or toner cartridges.
Calibrate your printer: Follow the calibration process outlined in your printer’s manual or software to fine-tune color accuracy and print quality.
Use genuine ink or toner cartridges: Opt for genuine HP ink or toner cartridges to ensure consistent and high-quality prints.
Avoid paper jams: Properly load paper and regularly clear any paper jams to prevent print quality issues caused by misaligned or crumpled paper.
By implementing these steps, you can enhance the print quality of your HP printer and achieve more vibrant and accurate prints.
FAQs:
Access the printer’s control panel or settings menu.
Look for the ink calibration or maintenance option.
Select the ink calibration option and follow the prompts on the screen.
The printer typically prints a calibration page or performs a calibration routine to optimize ink usage and print quality.
To test your printer alignment, follow these steps:
Open a blank document or a document with a simple design on your computer.
Print the document on a plain white sheet of paper using your HP printer.
Inspect the printed output and check if the alignment appears straight and evenly spaced.
If you notice any misalignment or uneven printing, consider running the printer’s alignment process (as described in a previous answer) to correct the issue.
Conclusion
By following the step-by-step instructions in this guide, you can achieve accurate colors, improved print quality, and consistent results.
Regular calibration is essential to maintain optimal performance. As you continue to use your HP printer, periodically revisit the calibration process to ensure that it meets your printing needs and adapts to any changes in Ink, paper, or environmental conditions.
With a properly calibrated printer, you can unleash the true potential of your HP printer and enjoy professional-quality prints every time. Happy printing!