How To Use or Configure an OpenVPN Tunnel
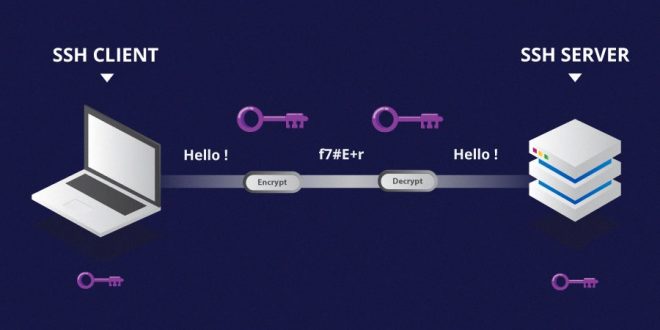
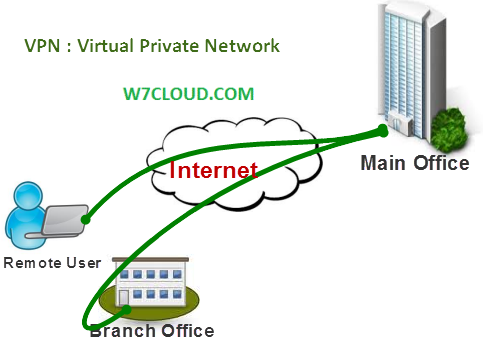
OpenVPN is a multiplatform VPN (virtual private network) client / server. It supports Microsoft Windows, GNU / Linux, MacOS operating systems and even has free apps for Android and iOS. Another strong point of OpenVPN is that some routers manufacturers are incorporating it into their computers, so we will have the possibility to configure an OpenVPN server in our router. Another noteworthy aspect is that, for example, firewall-oriented operating systems also incorporate it, PFsense and OPNSense are two highly recommended distributions for using OpenVPN and the rest of its configuration options.
How to Creat OpenVPN Server
If we create an OpenVPN server in our home, we can use it to connect to the Internet in a secure way from any wired or WiFi network, with WEP / WPA encryption or without encryption. All the traffic will go through a tunnel from our computer where we connect, to our house and from there it will go to the Internet, it is like being in our home. We must take into account several factors, such as having a good upload speed (30Mbps or higher), and having a public IP address in our home. When mounting an OpenVPN server in our home, we can also access each and every one of the shared resources we have, such as Samba servers, FTP and even access the printer.
Features Of OPENVPN
OpenVPN uses a set of SSL / TLS protocols that work in the transport layer, and we have two types of operation:
- TUN : The TUN driver emulates a point-to-point device, it is used to create virtual tunnels operating with the IP protocol . In this way you can encapsulate all the packets that are transported through it as TCP or UDP datagrams (later you will see that we choose UDP instead of TCP, and you will ask why, since TCP is connective, reliable and connection oriented) . The machines that are behind each end of the link will belong to different subnets.
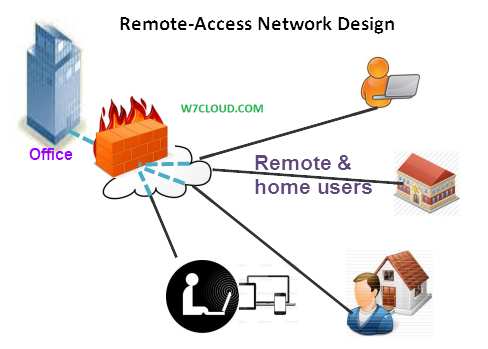
- TAP : Simulates an Ethernet network interface, more commonly known as bridge or bridge mode, these virtual tunnels encapsulate ethernet packets directly . This situation allows the packaging of fabrics different from the IP. The machines located behind each end of the link can operate as part of the same subnet (if the IP protocol is used). The bridge operating mode is particularly useful for linking remote users, since they can connect to the same server and virtually form part of the main network.
In the manual we will use TUN and we will see how we create a virtual subnet 10.8.0.0/24 where the OpenVPN clients will be when they connect.
In this manual I will explain how to do it in GNU / Linux (in Debian 9) , although in essence, it is the same for Windows , only change the commands in the console (cmd.exe), certificates and keys, are the same for both , that is, you can create ALL in GNU / Linux and then pass it to Windows to use it (either client or server), you only have to change the client / server extension .conf to .ovpn
In this manual I am going to teach you how to make a very secure OpenVPN configuration, customizing the algorithms of symmetric, asymmetric and hash encryption. In this way, we can have the best possible encryption of communications.
Summary of the cryptography to be used
- We will use the RSA asymmetric encryption of 4096 bits to create the Certification Authority , the server certificates and also the certificates of the clients.
- The symmetric key algorithm will be AES-256-GCM , the most secure at the moment and that the compatibility in OpenVPN 2.4 has been incorporated. If your version of OpenVPN is not this, you should use AES-256-CBC for example. If you want to check if your server or client supports this type of encryption, you must put in console “openvpn -show-ciphers”. We recommend you read our article about OpenVPN 2.4 and AEAD to know what differences there are:
- The hash algorithm that we will use will be SHA512 , although it will not be used either in the control channel (because we will use TLS 1.2 as you will see) nor in the data channel if we use GCM (with CBC it would be used to provide integrity communication ). If you want to check if your server or client supports this, you will have to put in console “openvpn -show-digests”
- We will configure the control channel with TLS 1.2 and the maximum possible security: TLS-ECDHE-RSA-WITH-AES-256-GCM-SHA384. If you want to check if your server or client supports this type of encryption, you will have to put in console “openvpn -show-tls”.
In addition to these security measures, we will include an additional HMAC signature for the first TLS negotiation, in this way, we will protect the system from possible denial of service attacks, UDP Port Flooding attacks and also TCP SYN attacks. When connecting to the server, if the client does not have the correct HMAC signature, it will be blocked. In previous versions of OpenVPN 2.4 the directive was tls-auth , which was responsible only for the authentication of a pre-shared key generated by OpenVPN itself. Now in versions higher than OpenVPN 2.4 it is called tls-crypt, the main difference is that in addition to authenticating, it also encrypts the channel so that nobody is able to capture said pre-shared key. The configuration is very similar, the generation of the key is exactly the same in both.
Finally, we will use the UDP protocol instead of TCP because it is stronger against denial of service attacks, we must remember that UDP is non-connective, unreliable and non-connection oriented. However, we can use TCP without any problem to provide the VPN with all the benefits of this protocol.
Step 1: Install OpenVPN and download Easy-RSA 3
The first thing we have to do is install OpenVPN on our computer, either with Windows or Linux. If you use Windows, you must go to the official OpenVPN download website and install everything in the installation wizard. If you use an operating system such as Debian (we will use Debian 9 throughout the manual), you will have to enter the following command:
1 |
sudo apt update |
| 2 | sudo apt install openvpn |
Once installed, we will have to download the Easy-RSA 3 software package, this software package is used to create digital certificates easily and quickly. We can modify the length of the key, the type of key, if we want to put a password to private keys etc. On the official website of the Easy-RSA 3 project of GitHub you have all the information and the possibility of downloading a .zip with everything.
If you are on a Linux system, we recommend you use the wget command to download the .zip:
Next, we must unzip this downloaded file and enter inside the folder to start configuring the vars file.
1 |
unzip EasyRSA-3.0.3.zip |
Step 2: Configure “vars” of Easy-RSA 3
The vars.example file is the center of all the configuration of the certificates, it is where we will have to define if we want to create certificates of 2048 bits, 4096 bits or higher, likewise it will also allow us to sign the certificates with SHA256 or with SHA512 among others. That is, we must configure this configuration file correctly to later create the digital certificates.
The first thing we must do is copy the file vars.example in the same folder with name “vars”, if we do not have it with this name “vars” will not act. We also have the possibility to rename the file vars.example in “vars”, but we recommend you to make a backup in case you delete something and then it does not work for you.
We place ourselves in the Easy-RSA3 main folder and copy the file in this way:
1 |
cp vars.example vars |
Once we have the file “vars”, we must edit it with any file editor via console or graphic interface, we will use nano due to its ease. In the following configuration file of “vars” you can see how it would be with RSA of 4096 bits, signed with SHA256 and the data of the “organization”. In the file itself are the original comments in English, and in Spanish I have put mine to facilitate the location of what needs to be modified.
# Easy-RSA 3 parameter settings
# NOTE: If you installed Easy-RSA from your distro’s package manager, do not edit
# this file in place – instead, you should copy the entire easy-rsa directory
# to another location so future upgrades do not wipe out your changes .# HOW TO USE THIS FILE
#
# vars.example contains built-in examples to Easy-RSA settings. You MUST name
# this file ‘vars’ if you want it to be used as a configuration file. If you do
not, it WILL NOT be automatically read when you call easyrsa commands.
#
# It is not necessary to use this config file if you wish to change
# operational defaults. These defaults should be fine for many uses without the
# need to copy and edit the ‘vars’ file.
#
# All of the editable settings are shown commented and start with the command
# ‘set_var’ – this means any set_var command that is uncommented has been
# modified by the user. If you’re happy with a default, there is no need to
# define the value to its default.# NOTES FOR WINDOWS USERS
#
# Paths for Windows * MUST * use forward slashes, or optionally double-esscaped
# backslashes (single forward slashes are recommended.) This means your path to
the openssl binary might look like this:
# “C: / Program Files / OpenSSL-Win32 / bin / openssl.exe ”# A little housekeeping: DO NOT EDIT THIS SECTION
#
# Easy-RSA 3.x does not source into the environment directly.
# Complain if a user tries to do this:
if [-z “$ EASYRSA_CALLER”]; then
echo “You appear to be sourcing an Easy-RSA ‘vars’ file.”> & 2
echo “This is no longer necessary and is disallowed. See the section called “> & 2
echo” ‘How to use this file’ next to the comments for more details. “> & 2
return 1
fi# DO YOUR EDITS BELOW THIS POINT
# This variable should point to the top level of the easy-rsa tree. By default,
# this is taken to be the directory you are currently in.#set_var EASYRSA “$ PWD”
# If your OpenSSL command is not in the PATH system, you will need to define the
# path to it here. Normally this means a full path to the executable, otherwise
# you could have left it undefined here and the shown default would be used.
#
# Windows users, remember to use paths with forward-slashes (or escaped
# back-slashes.) Windows users should declare the full path to the openssl
# binary here if it is not in their system PATH.#set_var EASYRSA_OPENSSL “openssl”
#
# This sample is in Windows syntax – edit it for your path if not using PATH:
#set_var EASYRSA_OPENSSL “C: / Program Files / OpenSSL-Win32 / bin / openssl.exe”# Edit this variable to point to your soon-to-be-created key directory.
#
# WARNING: init-pki will do a rm -rf on this directory so make sure you define
# it correctly! (Interactive mode will prompt before acting.)# BY DEFECT THIS DIRECTORY WILL BE USED WHEN WE BELIEVE THE CERTIFICATES, WE WILL BE ABLE TO CHANGE IT FOR WHAT WE WANT.
#set_var EASYRSA_PKI “$ EASYRSA / pki”
# Define X509 DN mode.
# This is
the “Distinguished Name.”
#########################################################################################
#
# Choices are:
# cn_only – use just to CN value
# org – use the “traditional” Country / Province / City / Org / OU / email / CN format# WE SELECT ORG THAT IS THE TRADITIONAL FORMAT OF THE DIGITAL CERTIFICATES, ALTHOUGH WE CAN ALSO USE ONLY THE DN
set_var EASYRSA_DN “org”
# Organizational fields (used with ‘org’ mode and ignored in ‘cn_only’ mode.)
# These are the default values for fields which will be placed in the
# certificate. Do not leave any of these fields blank, although interactively
# you may omit any specific field by typing the “.” Symbol (not valid for
# email.)# WE PLACE ALL THE DATA OF THE CERTIFICATE, BY GENERATING IT THESE WILL BE THE DEFAULT VALUES (WE WILL BE ABLE TO CHANGE THEM WITHOUT PROBLEMS)
set_var EASYRSA_REQ_COUNTRY “EN”
set_var EASYRSA_REQ_PROVINCE “Guadalajara”
set_var EASYRSA_REQ_CITY “Guadalajara”
set_var EASYRSA_REQ_ORG “RedesZone”
set_var EASYRSA_REQ_EMAIL “webmaster@redeszone.net”
set_var EASYRSA_REQ_OU “RedesZoneTeam”# Choose a size in bits for your keypairs. The recommended value is 2048. Using
# 2048-bit keys is considered more than sufficient for many years into the
# future. Larger keysizes will slow down TLS negotiation and make key / DH param
# generation take much longer. Values up to 4096 should be accepted by most
# software. Only used when the crypto alg is rsa (see below.)#CONFIGURE RSA OF 4096 BITS, TODAY COMPATIBLE WITH ALL SOFTWARE
set_var EASYRSA_KEY_SIZE 4096# The default crypto mode is rsa; ec can enable elliptic curve support.
# Note that not all software supports ECC, so use care when enabling it.
# Choices for crypto alg are: (each in lower-case)
# * rsa
# * ec# WE USE RSA ALGORITHM AND NOT ELLIPTICAL CURVES, SINCE SOME SOFTWARE IS POSSIBLE NOT SUPPORT IT.
set_var EASYRSA_ALGO rsa# Define the named curve, used in ec mode only:
#set_var EASYRSA_CURVE secp384r1
# CONFIGURATION OF THE EXPIRATION OF THE CERTIFICATION AUTHORITY, BY DEFAULT
#set_var EASYRSA_CA_EXPIRE 3650
# CONFIGURATION OF THE EXPIRATION OF THE AUTHORITY OF CERTIFICATES, BY DEFAULT
#set_var EASYRSA_CERT_EXPIRE 3650
# How many days until the next CRL publish date? Note that the CRL can still be
parsed after this timeframe passes. It is only used for an expected next
# publication date.#set_var EASYRSA_CRL_DAYS 180
# Support deprecated “Netscape” extensions? (choices “yes” or “no”.) The default
# is “no” to discourage use of deprecated extensions. If you require this
# feature to use with -ns-cert-type, set this to “yes” here. This support
# should be replaced with the more modern -remote-cert-tls feature. If you do
not use -en-cert-type in your config, it is safe (and recommended) to leave
# this defined to “no”. When set to “yes”, server-signed certs get the
# nsCertType = server attribute, and also get any NS_COMMENT defined below in the
# nsComment field.# DEFAULT VALUE BECAUSE TODAY, IT ALREADY SUPPORTS ALL LAST VERSIONS -REMOTE-CERT-TLS
#set_var EASYRSA_NS_SUPPORT “no”# When NS_SUPPORT is set to “yes”, this field is added to the nsComment field.
# Set this blank to omit it. With NS_SUPPORT set to “no” this field is ignored.#set_var EASYRSA_NS_COMMENT “Easy-RSA Generated Certificate”
# A temp file used to stage cert extensions during signing. The default should
# be fine for most users; However, some users might want an alternative under a
# RAM-based FS, such as / dev / shm or / tmp on some systems.#set_var EASYRSA_TEMP_FILE “$ EASYRSA_PKI / extensions.temp”
# !!
# NOTE: ADVANCED OPTIONS BELOW THIS POINT
# PLAY WITH THEM AT YOUR OWN RISK
# !!# Broken shell command aliases: If you have a badly broken shell that is
# missing any of these POSIX-required commands used by Easy-RSA, you will need
to define an alias to the proper path for the command. The symptom will be
# some form of a ‘command not found’ error from your shell. This means your
# shell is BROKEN, but you can hack around it here if you really need. These
# shown values are not defaults: it is up to you to know what you are doing if
# you touch these.
#
#alias awk = “/ alt / bin / awk”
#alias cat = “/ alt / bin / cat”# X509 extensions directory:
# If you want to customize the X509 extensions used, set the directory to look
# for extensions here. Each cert type you sign must have a matching filename,
# and an optional file named ‘COMMON’ is included first when present. Note that
# when undefined here, default behavior is to look in $ EASYRSA_PKI first, then
# fallback to $ EASYRSA for the ‘x509-types’ dir. You may override this
# detection with an explicit dir here.
#
#set_var EASYRSA_EXT_DIR “$ EASYRSA / x509-types”# OpenSSL config file:
# If you need to use a specific openssl config file, you can reference it here.
# Normally this file is auto-detected from a file named openssl-1.0.cnf from the
# EASYRSA_PKI or EASYRSA dir (in that order.) NOTE that this file is Easy-RSA
# specific and you can not just use a standard config file, so this is an
# advanced feature#set_var EASYRSA_SSL_CONF “$ EASYRSA / openssl-1.0.cnf”
# Default CN:
# This is best left alone. Interactively you will set this manually, and BATCH
# callers are expected to set this themselves.# THE COMMON NAME OR CN MUST ALWAYS BE UNIQUE FOR EACH CERTIFICATE CREATED, THEREFORE IT IS THE ONLY THING THAT WE SHOULD CHANGE IN THE ASSISTANT
#set_var EASYRSA_REQ_CN “ChangeMe”# Cryptographic digest to use.
# Do not change this default unless you understand the security implications.
# Valid choices include: md5, sha1, sha256, sha224, sha384, sha512# USE TODAY ON DAY SHA256 IS SAFE, THEREFORE WE WILL USE THIS.
set_var EASYRSA_DIGEST “sha256”# Batch mode. Leave this disabled unless you intend to call Easy-RSA explicitly
# in batch mode without any user input, confirmation on dangerous operations,
# or most output. Setting this to any non-blank string enables batch mode.#set_var EASYRSA_BATCH “”
Once we have modified everything, we save the file since later we will use it with these values.
Step 3: Create the CA, the certificates for the server and for the clients
Creation of the PKI and the Certification Authority
When we already have the “vars” file configured, we proceed to create the Public Key Infrastructure (PKI) with the following order (we assume that you are still in the Easy-RSA3 main directory):
1 |
./easyrsa init-pki |
root @ debian9vm: /home/bron/EasyRSA-3.0.3# ./easyrsa init-pki
Note: using Easy-RSA configuration from: ./vars
init-pki complete; you may now create a CA or requests.
Your newly created PKI dir is: /home/bron/EasyRSA-3.0.3/pki
Once the PKI has been initialized, we must create the Certification Authority (CA):
1 |
./easyrsa build-ca |
Once executed, we must follow the simple CA generation wizard. The password that you ask us is to protect the private key of the CA, something fundamental.
root @ debian9vm: /home/bron/EasyRSA-3.0.3# ./easyrsa build-ca
Note: using Easy-RSA configuration from: ./vars
Generating to 4096 bit RSA private key
………………………………………………………………………………… …………………. ++
………………………………………… ++
writing new private key to ‘/home/bron/EasyRSA-3.0.3/pki/private/ca .key.RXM28vZXRi ‘
Enter PEM pass phrase:
Verifying – Enter PEM pass phrase:
–
You are about to be asked to enter information that will be incorporated
into your certificate request.
What you are about to enter is what is called a Distinguished Name or a DN.
There are some fields but you can leave some blank
For some fields there will be a default value,
if you enter ‘.’, The field will be left blank.
–
Country Name (2 letter code) [EN]:
State or Province Name (full name) [Guadalajara]:
Locality Name (eg, city) [Guadalajara]:
Organization Name (eg, company) [RedesZone]:
Organizational Unit Name (eg , section) [RedesZoneTeam]:
Common Name (eg: your user, host, or server name) [Easy-RSA CA]: ca-openvpn-redeszone
Email Address [webmaster@redeszone.net]:CA creation complete and you can now import and sign cert requests.
Your new CA certificate file for publishing is at:
/home/bron/EasyRSA-3.0.3/pki/ca.crt
If we do not want to enter a password in the private key of the CA, we must put this command:
1 |
./easyrsa build-ca nopass |
Once we have created the CA, we must create the server certificate, and the client certificates. Next, we will have to sign it with the CA.
Creating the server certificate and signing it with the CA
When creating server and client certificates, we can provide them with a password for the private key, however, it is not recommended to do it on the server since every time we start it, it will ask for the password to use it. If we do not want a password, we will put “nopass” behind each order that you will see below.
1 |
./easyrsa gen-req servidor-openvpn-redeszone nopass |
The output of the terminal is as follows:
root @ debian9vm: /home/bron/EasyRSA-3.0.3# ./easyrsa gen-req server-openvpn-redeszone nopass
Note: using Easy-RSA configuration from: ./vars
Generating to 4096 bit RSA private key
……………………………………………………………………………. + +
………………………………………………………………………………………………… .. ++
writing new private key to ‘/ home /bron/EasyRSA-3.0.3/pki/private/servidor-openvpn-redeszone.key.YRNDwfwain ‘
–
You are about to be asked to enter information that will be incorporated
into your certificate request.
What you are about to enter is what is called a Distinguished Name or a DN.
There are some fields but you can leave some blank
For some fields there will be a default value,
if you enter ‘.’, The field will be left blank.
–
Country Name (2 letter code) [ES]:
State or Province Name (full name) [Guadalajara]:
Locality Name (eg, city) [Guadalajara]:
Organization Name (eg, company) [RedesZone]:
Organizational Unit Name (eg, section) [RedesZoneTeam]:
Common Name (eg : your user, host, or server name) [server-openvpn-redeszone]:
Email Address [webmaster@redeszone.net]:Keypair and certificate request completed. Your files are:
req: /home/bron/EasyRSA-3.0.3/pki/reqs/servidor-openvpn-redeszone.req
key: /home/bron/EasyRSA-3.0.3/pki/private/servidor-openvpn-redeszone .key
Once the certificate is created, we will have to sign it with the CA in “server” mode:
1 |
./easyrsa sign-req server servidor-openvpn-redeszone |
root @ debian9vm: /home/bron/EasyRSA-3.0.3# ./easyrsa sign-req server server-openvpn-redeszone
Note: using Easy-RSA configuration from: ./vars
rand: Use -help for summary.
You are about to sign the following certificate.
Please check over the details shown below for accuracy. Note that this request
has not been cryptographically verified. Please be sure it came from a trusted
source or that you have verified the request checksum with the sender.Request subject, to be signed as a server certificate for 3650 days:
subject = countryName
= ES
stateOrProvinceName = Guadalajara
localityName = Guadalajara
organizationName = RedesZone
organizationalUnitName = RedesZoneTeam
commonName = servidor-openvpn-redeszone
emailAddress = webmaster@redeszone.net
Type the word ‘yes’ to continue, or any other input to abort.
Confirm request details: yes
./easyrsa: 644: ./easyrsa: [[: not found
Using configuration from ./openssl-1.0.cnf
Enter pass phrase for /home/bron/EasyRSA-3.0.3/pki/private/ca .key:
Can not open /home/bron/EasyRSA-3.0.3/pki/index.txt.attr for reading, No such file or directory
139686052336896: error: 02001002: system library: fopen: No such file or directory: ../crypto/bio/bss_file.c:74:fopen(‘/home/bron/EasyRSA-3.0.3/pki/index.txt.attr’,’r ‘)
139686052336896: error: 2006D080: BIO routines: BIO_new_file : no such file: ../ crypto / bio / bss_file.c: 81:
Check that the request matches the signature
Signature ok
The Subject’s Distinguished Name is as follows
countryName: PRINTABLE: ‘EN’
stateOrProvinceName: ASN.1 12: ‘Guadalajara’
localityName: ASN.1 12: ‘Guadalajara’
organizationName: ASN.1 12: ‘RedesZone’
organizationalUnitName: ASN.1 12: ‘RedesZoneTeam’
commonName: ASN .1 12: ‘server-openvpn-redeszone’
emailAddress: IA5STRING:’webmaster@redeszone.net ‘
Certificate is to be certified until Sep 20 07:08:04 2027 GMT (3650 days)Write out database with 1 new entries
Data Base UpdatedCertificate created at: /home/bron/EasyRSA-3.0.3/pki/issued/server-openvpn-redeszone.crt
And we have already created the .crt that we will use later in the OpenVPN configuration file.
Creating customer certificates and signing them with the CA
The steps that you will see below, we will have to do once FOR EACH CUSTOMER that we are going to create. That is, if we are going to create 2 clients, we must follow the steps of creating and signing twice. In this part it is advisable to create the client certificates with a password, so we will have the security that if we lose the certificate, nobody will be able to use it. We in the manual will not introduce any password (we will put nopass at the end).
1 |
./easyrsa gen-req cliente1-openvpn-redeszone nopass |
root @ debian9vm: /home/bron/EasyRSA-3.0.3# ./easyrsa gen-req client1-openvpn-redeszone nopass
Note: using Easy-RSA configuration from: ./vars
Generating to 4096 bit RSA private key
………………. ++
………………. ++
writing new private key to ‘/ home / bron / EasyRSA- 3.0.3 / pki / private / client1-openvpn-redeszone.key.LuUGngiEQy ‘
–
You are about to be asked to enter information that will be incorporated
into your certificate request.
What you are about to enter is what is called a Distinguished Name or a DN.
There are some fields but you can leave some blank
For some fields there will be a default value,
if you enter ‘.’, The field will be left blank.
–
Country Name (2 letter code) [EN]:
State or Province Name (full name) [Guadalajara]:
Locality Name (eg, city) [Guadalajara]:
Organization Name (eg, company) [RedesZone]:
Organizational Unit Name (eg, section) [RedesZoneTeam]:
Common Name (eg: your user, host, or server name) [client1 -openvpn-redeszone]:
Email Address [webmaster@redeszone.net]:Keypair and certificate request completed. Your files are:
req: /home/bron/EasyRSA-3.0.3/pki/reqs/cliente1-openvpn-redeszone.req
key: /home/bron/EasyRSA-3.0.3/pki/private/cliente1-openvpn-redeszone .key
Once created, we will have to sign it:
1 |
./easyrsa sign-req client cliente1-openvpn-redeszone |
root @ debian9vm: /home/bron/EasyRSA-3.0.3# ./easyrsa sign-req client client1-openvpn-redeszone
Note: using Easy-RSA configuration from: ./vars
rand: Use -help for summary.
You are about to sign the following certificate.
Please check over the details shown below for accuracy. Note that this request
has not been cryptographically verified. Please be sure it came from a trusted
source or that you have verified the request checksum with the sender.Request subject, to be signed as a client certificate for 3650 days:
subject = countryName
= ES
stateOrProvinceName = Guadalajara
localityName = Guadalajara
organizationName = RedesZone
organizationalUnitName = RedesZoneTeam
commonName = client1-openvpn-redeszone
emailAddress = webmaster@redeszone.net
Type the word ‘yes’ to continue, or any other input to abort.
Confirm request details: yes
./easyrsa: 644: ./easyrsa: [[: not found
Using configuration from ./openssl-1.0.cnf
Enter pass phrase for /home/bron/EasyRSA-3.0.3/pki/private/ca .key:
Check that the request matches the signature
Signature ok
The Subject’s Distinguished Name is as follows
countryName: PRINTABLE: ‘IS’
stateOrProvinceName: ASN.1 12: ‘Guadalajara’
localityName: ASN.1 12: ‘Guadalajara’
organizationName: ASN. 1 12: ‘RedesZone’
organizationalUnitName: ASN.1 12: ‘RedesZoneTeam’
commonName: ASN.1 12: ‘client1-openvpn-redeszone’
emailAddress: IA5STRING:’webmaster@redeszone.net ‘
Certificate is to be certified until Sep 20 07:14:05 2027 GMT (3650 days)Write out database with 1 new entries
Data Base UpdatedCertificate created at: /home/bron/EasyRSA-3.0.3/pki/issued/cliente1-openvpn-redeszone.crt
If we wanted to create and sign a certificate number 2 for another client, we should put something like this:
1 |
./easyrsa gen-req cliente2-openvpn-redeszone nopass |
1 |
./easyrsa sign-req client cliente2-openvpn-redeszone |
Remember that if you want to enter a password, we must remove the “nopass”.
Organize the .crt and .key certificates of the server and clients
Something very important is to organize server and client certificates by folders. The server and client certificates are in the path “/ pki / issued /” and the private keys are in “/ pki / private”, the ca.crt is in the root of the “pki” folder. We must create three folders with the following content (for now):
- server: ca.crt, server-openvpn-redeszone.crt, server-openvpn-redeszone.key
- client1: ca.crt, client1-openvpn-redeszone.crt, client1-openvpn-redeszone.key
- client2: ca.crt, client2-openvpn-redeszone.crt, client2-openvpn-redeszone.key
Step 4: Create the Diffie-Hellmann parameters and the tls-auth key (tls-crypt in new systems)
Once we have created and signed certificates, we must create the Diffie-Hellmann parameters to place them in the “server” folder. To generate them, in the path of the EasyRSA3 folder we must execute the following command:
1 |
./easyrsa gen-dh |
By using 4096-bit keys, it is possible that the generation of these parameters takes hours depending on your computer, so you must have patience. While doing this process, you can continue with the rest of the manual to advance work.
When we have created the Diffie-Hellmann parameters, we must create the tls-auth key (tls-crypt now) with the name ta.key or the one we want. The order that we must put is the following:
1 |
openvpn --genkey --secret ta.key |
This key ta.key we will have to place it in the server and in ALL the clients.
Once arrived here, our folders with certificates should have the following:
- server: ca.crt, server-openvpn-redeszone.crt, server-openvpn-redeszone.key, dh.pem (Diffie-Hellmann), ta.key (tls-auth)
- client1: ca.crt, client1-openvpn-redeszone.crt, client1-openvpn-redeszone.key, ta.key (tls-auth)
- client2: ca.crt, client2-openvpn-redeszone.crt, client2-openvpn-redeszone.key, ta.key (tls-auth)
If we are going to use tls-auth instead of tls-crypt (because it is not compatible for example), we must keep this in mind:
In the server configuration (server.conf or server.ovpn) we must put:
tls-auth ta.key 0 (0 by Incoming)
In the configuration of the client (client.conf or client.ovpn) we must put:
tls-auth ta.key 1 (1 of Outgoing)
Then I put a table of what is each thing (the names vary).

When we have everything organized in folders, now is when we will have to create the configuration file (.conf for Linux systems and .ovpn for Windows systems).
Step 5: Configure the server
The configuration of the OpenVPN server is fundamental to give access permissions to the clients to our local network, to configure the TLS negotiation. Because we have hundreds of configurations available, we are going to put our configuration with some comments explaining each parameter, you can copy and paste the configuration without problems. Remember that for Linux you must have a .conf extension and for Windows .ovpn.
#PUERTO TO USE BY TCP OR UDP, DEFAULT IS 1194.
#PROTOCOLO TO USE TCP OR UDP
#MODO TUNNELING
port 11949
proto udp
dev tun#CERTIFICADOS
#SI WE HAVE THE .CONF IN THE SAME FOLDER DOES NOT MISS METER ROUTE, ONLY THE NAME.
#SI ARE ON ANOTHER ROUTE, WE SHOULD GO THE ROUTE OF ALL OF THEMca ca.crt
cert server-openvpn.crt
key server-openvpn.key
dh dh.pem
tls-crypt ta.key#CHECK THE CERTIFICATES OF THE CLIENTS (GREATER SECURITY)
remote-cert-tls client
#MODIFY THE SYNETRIC ENCRYPTION OF THE DATA CHANNEL, THE TLS CONTROL CHANNEL AND THE ALGORITHM TO VERIFY INTEGRITY.
#SI WE USE AES-256-GCM IT IS NOT NECESSARY TO PUT THE AUTH DIRECTIVE SINCE IT IS NOT USED.cipher AES-256-GCM
tls-cipher TLS-ECDHE-RSA-WITH-AES-256-GCM-SHA384
auth SHA512#TOPOLOGY OF THE NETWORK (SUBNET IS RECOMMENDED) AND VIRTUAL SUBRED WHERE THE CLIENTS WILL BE.
topology subnet
server 10.8.0.0 255.255.255.0#CONFIGURE THE SERVER SO THAT CUSTOMERS HAVE THE SAME IP ALWAYS, ONCE THEY ARE CONNECTED.
ifconfig-pool-persist ipp.txt# WE PROVIDE CUSTOMER ACCESS TO THE DOMESTIC NETWORK, WE MAKE INTERNET REDIRECTION AND PROVIDE DNS OF OPENDNS.
push “route 192.168.2.0 255.255.255.0”
push “redirect-gateway def1”
push “dhcp-option DNS 208.67.222.222”
push “dhcp-option DNS 208.67.220.220”# WE ENABLE COMMUNICATION AMONG CUSTOMERS, WE ENABLE KEEPALIVE TO KNOW IF THE TUNNEL HAS FALLEN, WE ENABLE COMPRESSION AND A MAXIMUM OF 100 CLIENTS SIMULTANEOUSLY
client-to-client
keepalive 10 120
comp-lzo
max-clients 100#SIN USER PERMISSIONS IN OPENVPN, FOR SERVER SECURITY
user nobody
group nogroup#CLAVE AND PERSISTENT
TUNNEL persist-key
persist-tun# THE LOGS OF THE SERVER IN THAT FILE, VERB 3 CONFIGURATION FOR THE LOGS.
status openvpn-status.log
verb 3
explicit-exit-notify 1
The output when we run “openvpn server.conf” is the following, the initialization of the server is correct.
root @ debian9vm: / home / bron / OPENVPN / server # openvpn server.conf
Fri Sep 22 09:52:17 2017 OpenVPN 2.4.0 x86_64-pc-linux-gnu [SSL (OpenSSL)] [LZO] [LZ4] [ EPOLL] [PKCS11] [MH / PKTINFO] [AEAD] built on Jun 22 2017
Fri Sep 22 09:52:17 2017 library versions: OpenSSL 1.0.2l May 25, 2017, LZO 2.08
Fri Sep 22 09:52:17 2017 Diffie -Hellman initialized with 4096 bit key
Fri Sep 22 09:52:17 2017 Outgoing Control Channel Encryption: Cipher ‘AES-256-CTR’ initialized with 256 bit key
Fri Sep 22 09:52:17 2017 Outgoing Control Channel Encryption: Using 256 bit message hash ‘SHA256’ for HMAC authentication
Fri Sep 22 09:52:17 2017 Incoming Control Channel Encryption: Cipher ‘AES-256-CTR’ initialized with 256 bit key
Fri Sep 22 09:52:17 2017 Incoming Control Channel Encryption: Using 256 bit message hash ‘SHA256’ for HMAC authentication
Fri Sep 22 09:52:17 2017 TUN / TAP device tun0 opened
Fri Sep 22 09:52:17 2017 TUN / TAP TX queue length set to 100
Fri Sep 22 09:52:17 2017 do_ifconfig, tt-> did_ifconfig_ipv6_setup = 0
Fri Sep 22 09:52:17 2017 / sbin / ip link set dev tun0 up mtu 1500
Fri Sep 22 09: 52:17 2017 / sbin / ip addr add dev tun0 10.8.0.1/24 broadcast 10.8.0.255
Fri Sep 22 09:52:17 2017 Could not determine IPv4 / IPv6 protocol. Using AF_INET
Fri Sep 22 09:52:17 2017 Socket Buffers: R = [212992-> 212992] S = [212992-> 212992]
Fri Sep 22 09:52:17 2017 UDPv4 local link (bound): [AF_INET] [ undef]: 11949
Fri Sep 22 09:52:17 2017 UDPv4 link remote: [AF_UNSPEC]
Fri Sep 22 09:52:17 2017 GID set to nogroup
Fri Sep 22 09:52:17 2017 UID set to nobody
Fri Sep 22 09:52:17 2017 MULTI: multi_init called, r = 256 v = 256
Fri Sep 22 09:52:17 2017 IFCONFIG POOL: base = 10.8.0.2 size = 252, ipv6 = 0
Fri Sep 22 09:52:17 2017 ifconfig_pool_read (), in = ‘client1.openvpn, 10.8.0.2’, ALL: IPv6
Fri Sep 22 09:52:17 2017 succeeded -> ifconfig_pool_set ()
Fri Sep 22 09:52:17 2017 IFCONFIG POOL LIST
Fri Sep 22 09:52:17 2017 client1.openvpn, 10.8.0.2
Fri Sep 22 09:52:17 2017 Initialization Sequence Completed
So far we have arrived with the server configuration, now we will configure the clients.
Step 6: Configure the client (or clients)
Next, you can see the configuration of the client associated to the server that we have seen previously. The only difference between the different clients.conf is the path of the certificates for example. Very important that the cipher, tls-cipher and other parameters are exactly the same, otherwise it will not connect to the server. Remember that for Linux you must have a .conf extension and for Windows .ovpn.
#CONFIGURE IN THE CLIENT MODE, TUN MODE, UDP PROTOCOL.
client
dev tun
proto udp#THE DIRECTIVE IS THE CONNECTION WITH THE PUBLIC IP OR DOMAIN OF THE SERVER OPENVPN, WE ALSO HAVE TO PUT THE SAME PORT OF THE SERVER
remote 127.0.0.1 11949# CONTINUOUSLY RESOLVE THE IP OR DOMAIN TO CONNECT US, KEY AND PERSISTENT TUN AS THE SERVER.
resolv-retry infinite
nobind
persist-key
persist-tun#RUTA DE LA CA, CUSTOMER CERTIFICATES AND TA.KEY.
#SI WE HAVE IT IN THE SAME FOLDER, IT IS NOT NECESSARY TO PUT THE WHOLE ROUTE.
ca ca.crt
cert client1.openvpn.crt
key client1.openvpn.key
tls-crypt ta.key#COMPROVE THE SERVER IDENTITY, USE SYMMETRIC ENCRYPTION GCM, CONFIGURATION OF TLS 1.2 AND AUTH.
remote-cert-tls server
cipher AES-256-GCM
tls-cipher TLS-ECDHE-RSA-WITH-AES-256-GCM-SHA384
auth SHA512# ENABLE COMPRESSION AND USE LOG OF VERBOSE LEVEL 3
comp-lzo
verb 3
The output when we run “openvpn client1.conf” is the following, the initialization of the server is correct.
bron @ debian9vm: ~ / OPENVPN / client1 $ sudo openvpn client.conf
[sudo] password for bron:
Fri Sep 22 10:01:28 2017 OpenVPN 2.4.0 x86_64-pc-linux-gnu [SSL (OpenSSL)] [LZO ] [LZ4] [EPOLL] [PKCS11] [MH / PKTINFO] [AEAD] built on Jun 22 2017
Fri Sep 22 10:01:28 2017 library versions: OpenSSL 1.0.2l May 25, 2017, LZO 2.08
Fri Sep 22 10: 01:28 2017 Outgoing Control Channel Encryption: Cipher ‘AES-256-CTR’ initialized with 256 bit key
Fri Sep 22 10:01:28 2017 Outgoing Control Channel Encryption: Using 256 bit message hash ‘SHA256’ for HMAC authentication
Fri Sep 22 10:01:28 2017 Incoming Control Channel Encryption: Cipher ‘AES-256-CTR’ initialized with 256 bit key
Fri Sep 22 10:01:28 2017 Incoming Control Channel Encryption: Using 256 bit message hash ‘SHA256’ for HMAC authentication
Fri Sep 22 10:01:28 2017 TCP / UDP: Preserving recently used remote address: [AF_INET] 127.0.0.1 : 11949
Fri Sep 22 10:01:28 2017 Socket Buffers: R = [212992-> 212992] S = [212992-> 212992]
Fri Sep 22 10:01:28 2017 UDP link local: (not bound)
Fri Sep 22 10:01:28 2017 UDP link remote: [AF_INET] 127.0.0.1:11949
Fri Sep 22 10:01:28 2017 NOTE: UID / GID downgrade will be delayed because of -client, -pull, or -up-delay
Fri Sep 22 10:01:28 2017 TLS: Initial packet from [AF_INET] 127.0.0.1:11949, sid = 7ccae64c 4a4737e3
Fri Sep 22 10:01:28 2017 VERIFY OK: depth = 1, C = ES, ST = Guadalajara, L = Guadalajara, O = RedesZone, OU = RedesZoneTeam, CN = ca-openvpn-redeszone, emailAddress = webmaster @ redeszone. net
Fri Sep 22 10:01:28 2017 Validating certificate key usage
Fri Sep 22 10:01:28 2017 ++ Certificate has key usage 00a0, expects 00a0
Fri Sep 22 10:01:28 2017 VERIFY KU OK
Fri Sep 22 10: 01:28 2017 Validating certificate extended key usage
Fri Sep 22 10:01:28 2017 ++ Certificate has EKU (str) TLS Web Server Authentication, expects TLS Web Server Authentication
Fri Sep 22 10:01:28 2017 VERIFY EKU OK
Fri Sep 22 10:01:28 2017 VERIFY OK: depth = 0, C = ES, ST = Guadalajara, L = Guadalajara, O = RedesZone, OU = RedesZoneTeam, CN = server-openvpn-redeszone, emailAddress = webmaster@redeszone.net
Fri Sep 22 10:01:28 2017 Control Channel: TLSv1.2, cipher TLSv1 / SSLv3 ECDHE-RSA-AES256-GCM-SHA384, 4096 bit RSA
Fri Sep 22 10:01:28 2017 [server-openvpn-redeszone] Peer Connection Initiated with [AF_INET] 127.0.0.1:11949
Fri Sep 22 10:01:29 2017 SENT CONTROL [server-openvpn]: ‘PUSH_REQUEST’ (status = 1)
Fri Sep 22 10:01:29 2017 PUSH: Received control message : ‘PUSH_REPLY, route 192.168.2.0 255.255.255.0, redirect-gateway def1, dhcp-option DNS 208.67.222.222, dhcp-option DNS 208.67.220.220, route-gateway 10.8.0.1, topology subnet, ping 10, ping-restart 120 , ifconfig 10.8.0.2 255.255.255.0, peer-id 0, cipher AES-256-GCM ‘
Fri Sep 22 10:01:29 2017 OPTIONS IMPORT: timers and / or timeouts modified
Fri Sep 22 10:01:29 2017 OPTIONS IMPORT : -ifconfig / up options modified
Fri Sep 22 10:01:29 2017 OPTIONS IMPORT: route options modified
Fri Sep 22 10:01:29 2017 OPTIONS IMPORT: route-related options modified
Fri Sep 22 10:01:29 2017 OPTIONS IMPORT: -ip-win32 and / or -dhcp-option options modified
Fri Sep 22 10:01:29 2017 OPTIONS IMPORT: peer-id set
Fri Sep 22 10:01:29 2017 OPTIONS IMPORT: adjusting link_mtu to 1625
Fri Sep 22 10:01:29 2017 OPTIONS IMPORT : data channel crypto options modified
Fri Sep 22 10:01:29 2017 Data Channel Encrypt: Cipher ‘AES-256-GCM’ initialized with 256 bit key
Fri Sep 22 10:01:29 2017 Data Channel Decrypt: Cipher ‘AES-256 -GCM ‘initialized with 256 bit key
Fri Sep 22 10:01:29 2017 ROUTE: default_gateway = UNDEF
Fri Sep 22 10:01:29 2017 TUN / TAP device tun1 opened
Fri Sep 22 10:01:29 2017 TUN / TAP TX queue length set to 100
Fri Sep 22 10:01:29 2017 do_ifconfig, tt-> did_ifconfig_ipv6_setup = 0
Fri Sep 22 10:01:29 2017 / sbin / ip link set dev tun1 up mtu 1500
Fri Sep 22 10:01:29 2017 / sbin / ip addr add dev tun1 10.8.0.2/24 broadcast 10.8.0.255
Fri Sep 22 10:01:29 2017 NOTE: unable to redirect default gateway – Can not read current default gateway from system
Fri Sep 22 10:01:29 2017 / sbin / ip route add 192.168.2.0/24 via 10.8.0.1
Fri Sep 22 10:01:29 2017 GID set to nogroup
Fri Sep 22 10:01:29 2017 UID set to nobody
Fri Sep 22 10:01:29 2017 Initialization Sequence Completed
If you use Windows, the folder of the certificates with the .ovpn extension configuration file must be in the default OpenVPN path which is C: \ Users \ Bron \ OpenVPN \ config by default, although we can change it. Once this is done, if we click right click on OpenVPN in the lower right bar we will see the name of the client file to connect successfully.
Latest OpenVPN recommendations
In order to have connectivity with the local network and the Internet, it is necessary to create a static route in the router of our home. With the configuration of 10.8.0.0/24 that we have configured in the OpenVPN server, we will have to create a static route with this information:
- IP subnet: 10.8.0.0
- Mask: 255.255.255.0
- Gateway: Local IP where we start the OpenVPN server, if for example we have installed in a Raspberry PI with IP 192.168.1.100, we must put this IP.
If you want to install OpenVPN in NAS4Free NAS-oriented operating system, you can read this manual step by step. The creation of the certificates would be done exactly the same, just change the installation form and execute it at the beginning: